In this guide provided by Space Hosting, we will learn how you can set up Apache Hadoop ons on Ubuntu 20.04 completely including dependencies such as Hadoop HDFS, yarn, Data Nodes, the configuration of localhost, etc.

Table of contents
- What is Apache Hadoop?
- Set up Apache Hadoop on Ubuntu 20.04
- Requirements
- Dependencies
- Hadoop User Account on Ubuntu
- Installation and Configuration of Hadoop Apache
- Configuration of Hadoop
- Formating Starting Hadoop
- Access Hadoop Apache Web Interface
The Operating System Ubuntu 20.04 we using for the tutorial is running on a Ryzen VPS. if you don’t own a server, you can purchase an AMD VPS
€ 2.99
First Month
1. What is Apache Hadoop?
Apache Hadoop is an open-source framework that is used to efficiently store and process large datasets ranging in size from gigabytes to petabytes of data under clustered systems. It is Java-based and uses Hadoop Distributed File System (HDFS) to store its data and process data using MapReduce.

Apache Hadoop plays an important role after performing the ETL (Extract Transform Load) steps in order to store the result in order to process or use it for analysis. Storing the data will not be easy because the size can be from gigabytes to petabytes (as mentioned in the above paragraph) and after storing it then make a backup of it so can be used later if 1 node stopped working. Apache Hadoop is a Java-based software platform that helps in managing data such as processing data and making replicas (backups) of it, etc.
2. Set up Apache Hadoop on Ubuntu 20.04
Before starting the installation and configuration of Apache Hadoop, please check if the requirements are fulfilled or not.
3. Requirements
- Root Server
- Fresh install Ubuntu/Debian OS
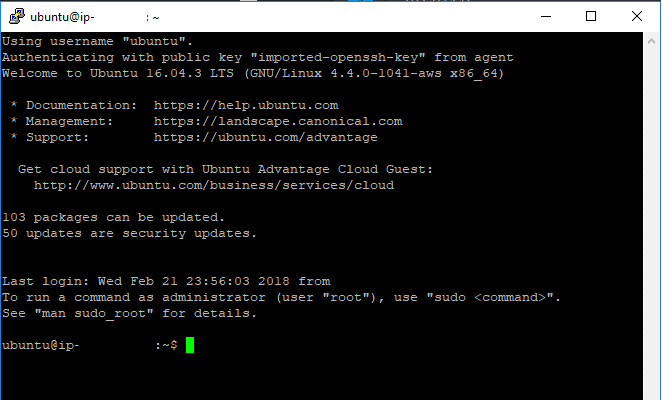
Connect to the server using Putty and type the following commands;

4. Dependencies
Install the dependencies and update your system with the following commands:
apt update
sudo apt install default-jdk default-jre -y
java -version
5. Hadoop User Account on Ubuntu
This account will be used by the Hadoop process in order to take complete access to the server with the help of sudo group. The following commands will create a Hadoop user and install OpenSSH so that later on accessible through keys
sudo adduser hadoop
sudo usermod -aG sudo hadoop
sudo su - hadoop
apt install openssh-server openssh-client -y
Now access the Hadoop user and generate the public key and add in authorized keys in order to access the user hadoop easily.
sudo su - hadoop
ssh-keygen -t rsa
sudo cat ~/.ssh/id_rsa.pub >> ~/.ssh/authorized_keys
sudo chmod 640 ~/.ssh/authorized_keys
ssh localhost
6. Installation and Configuration of Hadoop Apache
Hadoop Apache is designed to handle batch processing efficiently. Instead of using one large computer to store and process the data, Hadoop allows clustering multiple computers to analyze massive datasets in parallel more quickly with the help of Hadoop Apache.
wget https://downloads.apache.org/hadoop/common/hadoop-3.3.1/hadoop-3.3.1.tar.gz
tar -xvzf hadoop-3.3.1.tar.gz
sudo mv hadoop-3.3.1 /usr/local/hadoop
sudo mkdir /usr/local/hadoop/logs
sudo chown -R hadoop:hadoop /usr/local/hadoop
7. Configuration of Hadoop
The configuration of Hadoop is very important so the web UI and other modules such as DataNode, Resource Manager, and Name node work perfectly, In this guide, used default configuration so I recommend you also follow the exact same steps.
Please type the below commands properly and paste the text into the text editor.
Note: To save Nano Text Editor files, Press: CTRL + X Button to save a file
sudo nano ~/.bashrc# Paste the Following content on Text Editor
# Starting
export HADOOP_HOME=/usr/local/hadoop

export HADOOP_INSTALL=$HADOOP_HOME

export HADOOP_MAPRED_HOME=$HADOOP_HOME

export HADOOP_COMMON_HOME=$HADOOP_HOME

export HADOOP_HDFS_HOME=$HADOOP_HOME

export YARN_HOME=$HADOOP_HOME

export HADOOP_COMMON_LIB_NATIVE_DIR=$HADOOP_HOME/lib/native

export PATH=$PATH:$HADOOP_HOME/sbin:$HADOOP_HOME/bin

export HADOOP_OPTS="-Djava.library.path=$HADOOP_HOME/lib/native"

# END
source ~/.bashrc
which javac
readlink -f /usr/bin/javac
sudo nano $HADOOP_HOME/etc/hadoop/hadoop-env.sh
Paste the Following content on Text Editor
Configure the Java home location variable so java can access it with a single command.
# Starting
export JAVA_HOME=/usr/lib/jvm/java-11-openjdk-amd64
export HADOOP_CLASSPATH+=" $HADOOP_HOME/lib/*.jar"
# Ending
core-site.xml is the main file where ports are defined and other major configurations of Hadoop.
cd /usr/local/hadoop/lib
sudo wget https://jcenter.bintray.com/javax/activation/javax.activation-api/1.2.0/javax.activation-api-1.2.0.jar
hadoop version
sudo nano $HADOOP_HOME/etc/hadoop/core-site.xml
Paste the Following content on Text Editor
<configuration>

   <property>

      <name>fs.default.name</name>

      <value>hdfs://0.0.0.0:9000</value>

      <description>The default file system URI</description>

   </property>

</configuration>
sudo mkdir -p /home/hadoop/hdfs/{namenode,datanode}
sudo chown -R hadoop:hadoop /home/hadoop/hdfs
sudo nano $HADOOP_HOME/etc/hadoop/hdfs-site.xml
The below configuration defined the amount of distributed file system (DFS) replicas.
<configuration>

   <property>

      <name>dfs.replication</name>

      <value>1</value>

   </property>


   <property>

      <name>dfs.name.dir</name>

      <value>file:///home/hadoop/hdfs/namenode</value>

   </property>


   <property>

      <name>dfs.data.dir</name>

      <value>file:///home/hadoop/hdfs/datanode</value>

   </property>

</configuration>
sudo nano $HADOOP_HOME/etc/hadoop/mapred-site.xmlPaste the Following content on Text Editor
<configuration>

   <property>

      <name>mapreduce.framework.name</name>

      <value>yarn</value>

   </property>

</configuration>
sudo nano $HADOOP_HOME/etc/hadoop/yarn-site.xmlYarn (Yet another resource manager) controls the overall backend working of Hadoop apache.
<configuration>

   <property>

      <name>yarn.nodemanager.aux-services</name>

      <value>mapreduce_shuffle</value>

   </property>

</configuration>
8. Formating Starting Hadoop
sudo su - hadoop
hdfs namenode -format
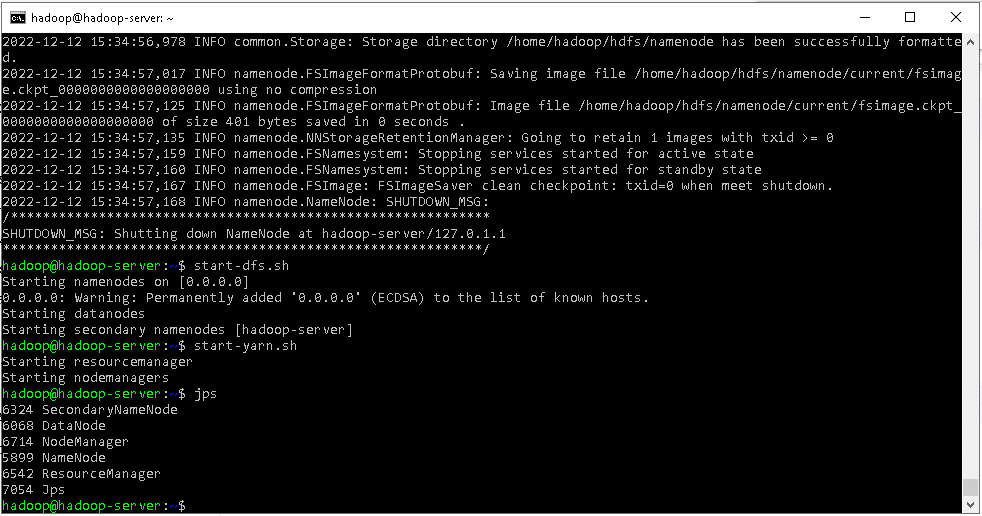
start-dfs.sh
start-yarn.sh
jps
After typing JPS, if screen display all of the modules such as Secondary NameNode, DataNode, NameNode, Resource Manage etc then it means hadoop apache successfully installed.
9. Access Hadoop Apache Web Interface
Visit URL: http://server-IP:9870
For Example
http://localhost:9870
or
http://173.51.23.123:9870
or
http://127.0.0.1:9870


0 commenti